I decided to make a new pillow yesterday for our Min-Pin Heidi. She is crated when we're not home, so I like to make sure she's comfy. I used scraps from 2 recycled felted sweaters for the pillow. Here's how I made it:
First, I selected the felted sweater fabric. This is most of a sweater and scraps from another project. If you've never felted (or fulled, if you want to use the technically accurate term) a sweater, I plan to cover that in a future post.

Then I decided how big to make the pillow. The little pillow form I had was 15" x 12", if you don't have a pillow form, you're free to make your pillow any size you like, and stuff it with polyfil or whatever you wish.

I cut my sweater fabric about an inch smaller than my pillow form, just to make sure it was poofy enough (interior design technical term) when it was done.

I also decided to use one of the sweater's side seams as one of the seams for my pillow. Less sewing is good...

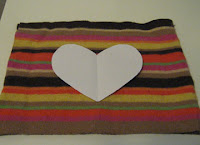
Time to embellish and make it fun. I decided on a heart motif, cause I love my pup. :) So I drew one on paper and cut it out to make a pattern. I placed it on my pillow fabric for size, and

then pinned it and cut it out of the contrasting sweater fabric. Then I did the same for the bone shape, only I cut it out of the striped fabric.


Using my zig zag stitch on my sewing machine, I sewed the bone piece to the heart piece. I have an applique stitch on my machine, but for this, the zig zag worked fine. I just shortened the stitch length.


Since the orange fabric is more tightly felted than the striped fabric, I didn't need to zig zag the heart to the pillow fabric. So I just did a straight stitch, leaving the edges raw.

Now you can sew up your seams for the pillow. Putting the two right sides of your pillow together, sew the seams on 3 of the sides. I used a 1/2" seam allowance. (Actually, I used the sweater seam as one of my seams, so I only had to sew 2). Anyway, leave one short end open to put the pillow form or polyfil in.

Now, clip the two sewn corners of your pillow, so that your corners will be nice and pointy when you turn your pillow right side out.

So now, turn the pillow right side out and it should look like this:

Insert your pillow form or fill with polyfil. Turn in the edges of the opening 1/2" inch and pin all the way across the open end like this:

Now you have a choice. You can hand sew the seam closed, (a much nicer, neater finished edge)
or you can do what I did, which is to machine stitch the seam closed. I thought that this would be sturdier than hand sewing because its for Heidi who might decide to fling the pillow around like a toy. And I don't think she minds that its not quite as neat a finish...

And Heidi's finished pillow...


